Table of Content
Are you getting too many spam comments, fake registrations or unwanted login attempts? Do you want to protect unnecessary submission of your WooCommerce, Easy Digital Downloads and BuddyPress forms? If yes, the best solution to all these problems is to add Google reCAPTCHA to your WordPress site.
There are several ways to protect your site from spam comments and unnecessary registration or login attempts. In this tutorial, we are going to demonstrate step by step guide to add Google reCAPTCHA to WordPress forms.
1. What is Google reCAPTCHA?

CAPTCHA is the short form of Completely Automated Public Turing test to tell Computers and Humans Apart. It is the tool that can be used to differentiate between automated users like robots and human users.
reCAPTCHA is an advanced form of CAPTCHA – A free service from Google that helps protect websites from spam and abuse. Google reCAPTCHA blocks automated software accessing your site whereas allowing real users to enter your website with ease.
2. Starting with Google reCAPTCHA Keys
First thing first, we can start with Google reCAPTCHA API keys setup. We need 2 types of keys (Site key & Secret key) to add Google reCAPTCHA to WordPress forms. Click here and get the journey started.
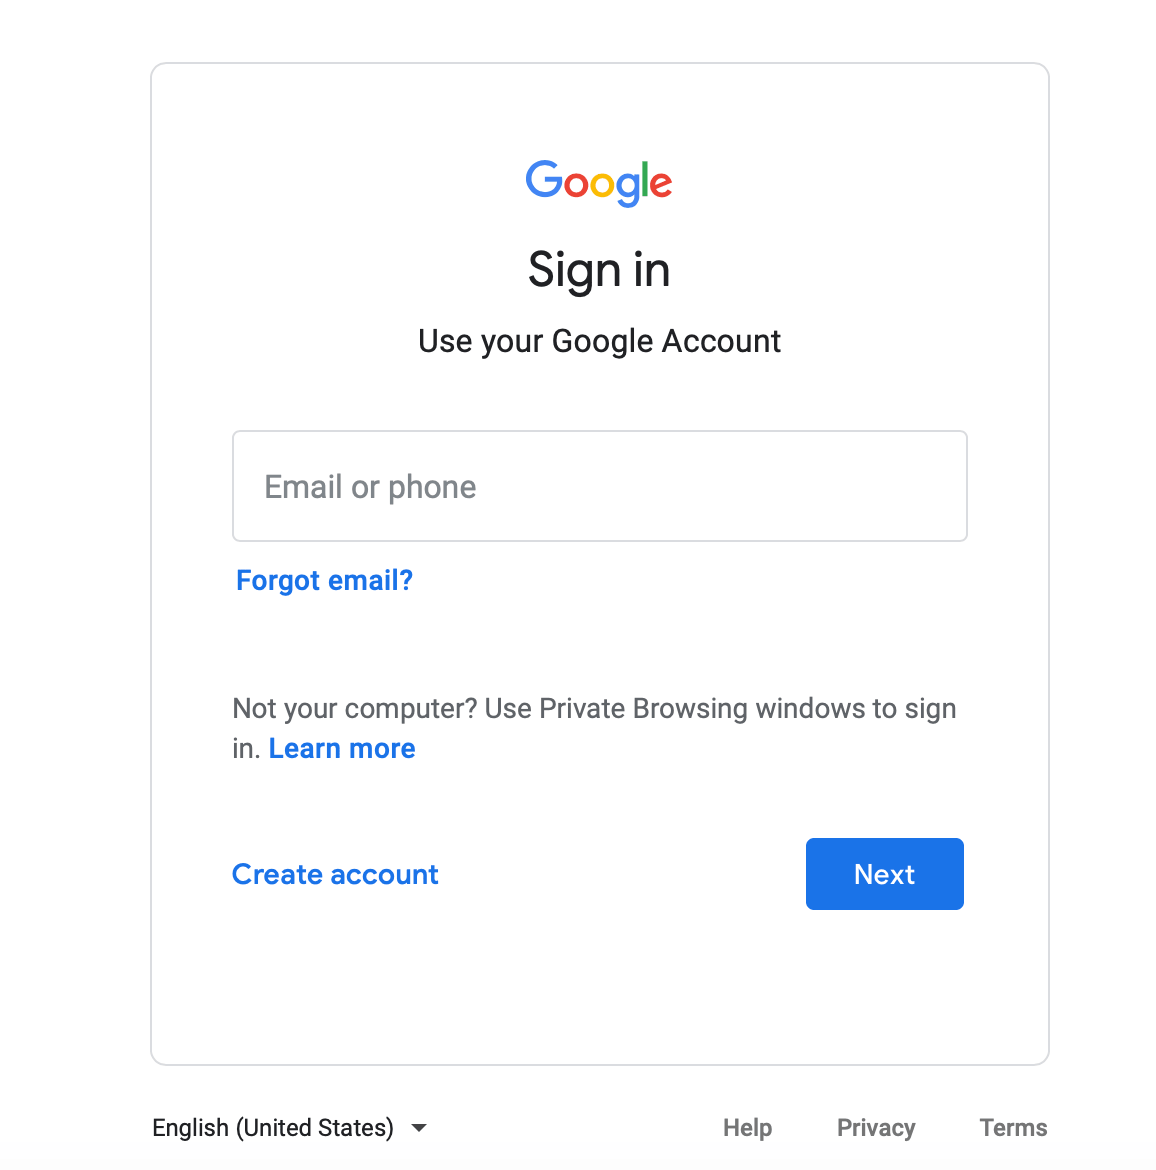
If you are not logged in, you will get a login form to sign in as shown above. Please login to your Google account to proceed forward.

On the admin page of Google reCAPTCHA, you can see the list of your existing websites or can add a new website.
Click on a ‘+’ icon at the top right corner as shown in the above screenshot to add a new website. Provide all the information stated below and submit the changes.
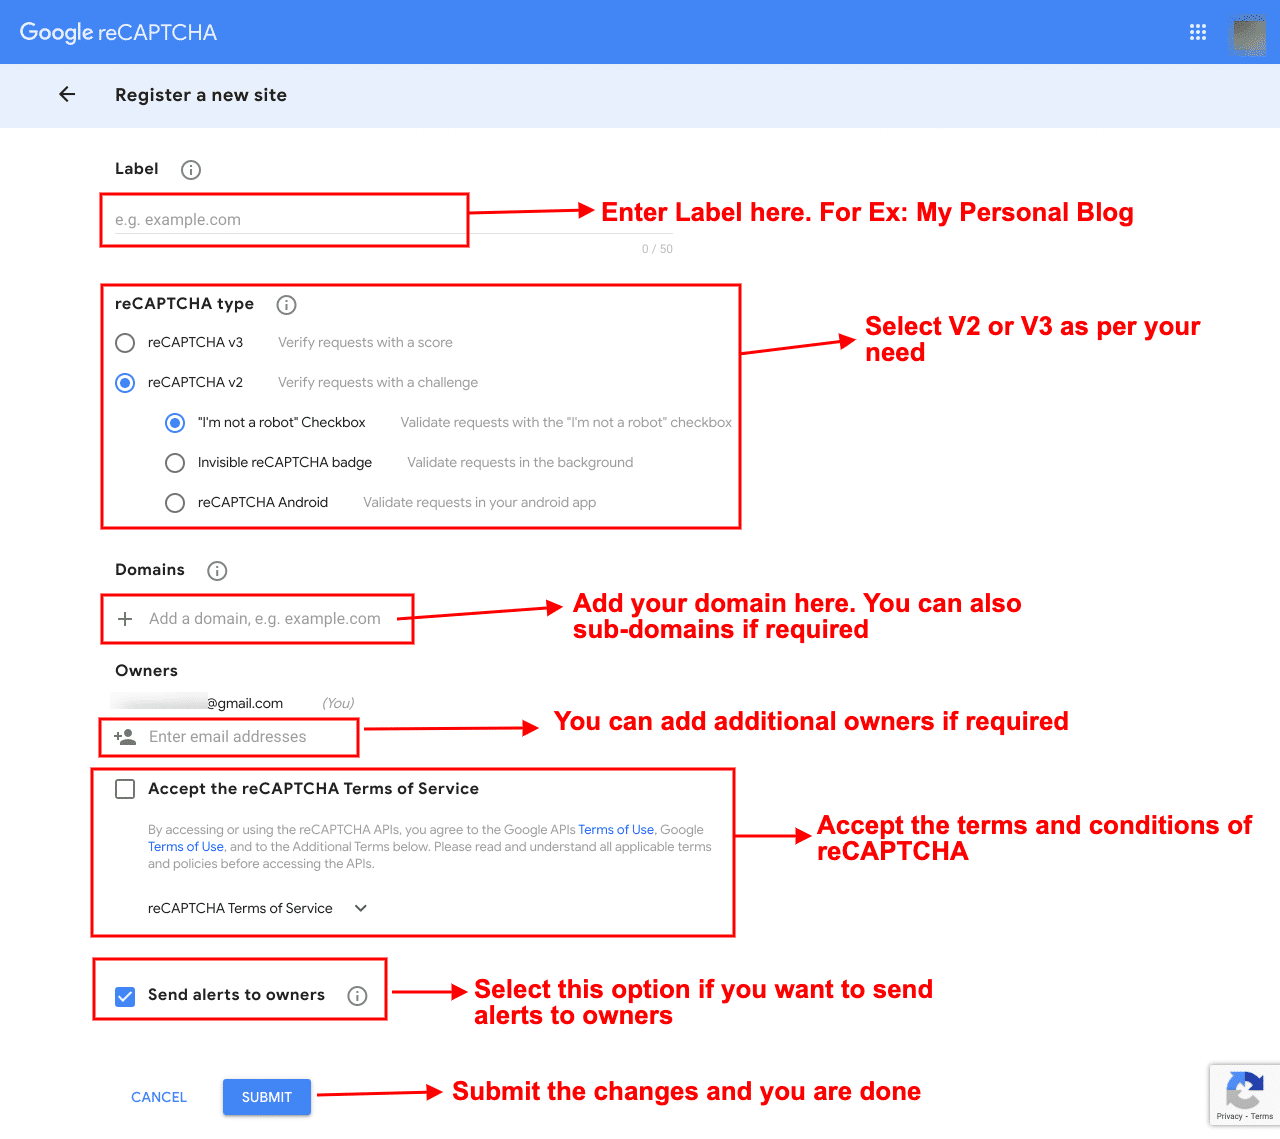
Once you complete the form and submit it, you will find SITE KEY and SECRET KEY as shown below:
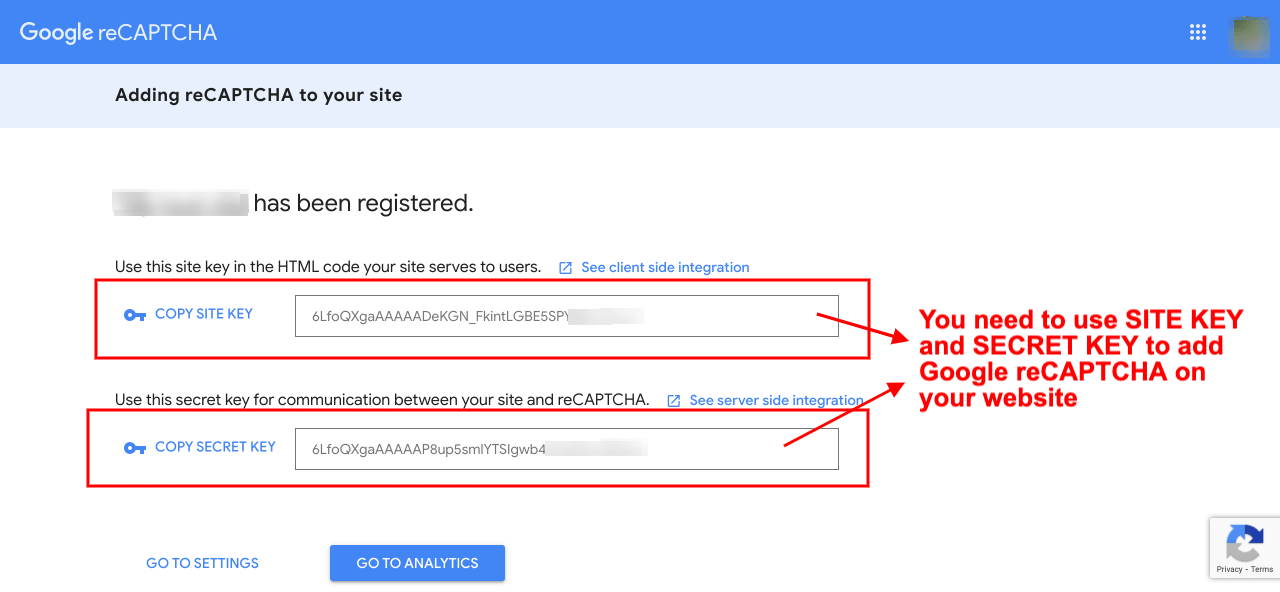
You will need these Keys (SITE KEY and SECRET KEY) to protect your WordPress website from unwanted registration and attacks. Now, let us proceed to the next step.
3. Getting Advanced Google reCAPTCHA Plugin
Advanced Google reCAPTCHA is a free WordPress plugin to add Google reCAPTCHA on your WordPress websites. It is one of the best reCAPTCHA plugins which ensures your WordPress website is safe from spam comments. Additionally, it protects user accounts, WooCommerce, Easy Digital Downloads, BuddyPress and other forms from brute-force attacks.
i. Plugin Installation
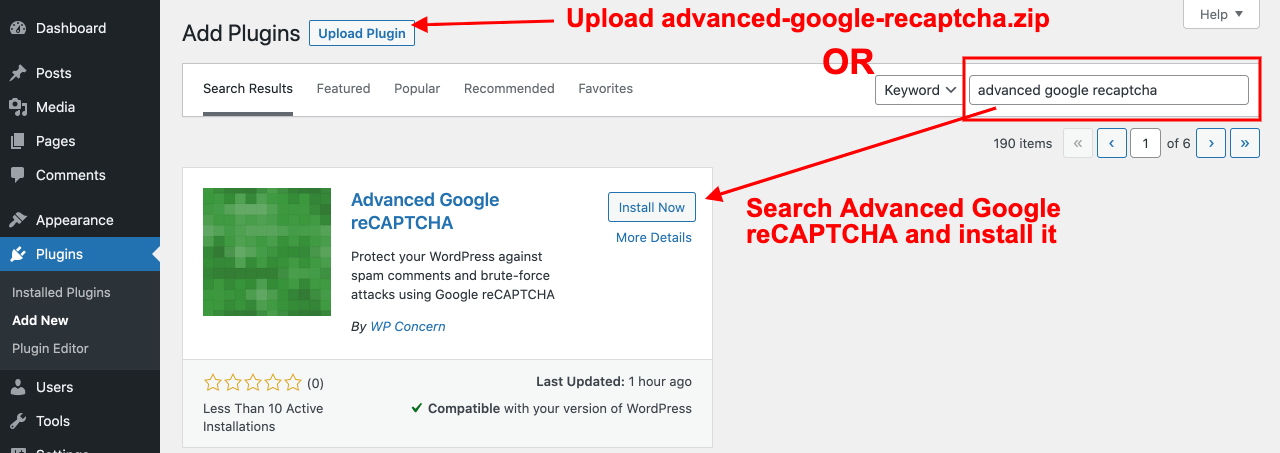
- Log in to the wp-admin dashboard. Go to Plugins >> Click Add New
- Search ‘Advanced Google reCAPTCHA’ on the search field as shown in the above screenshot
- Click on the ‘Install Now’ button of Advanced Google reCAPTCHA found in the search result
- Activate it
ii. Plugin Setup
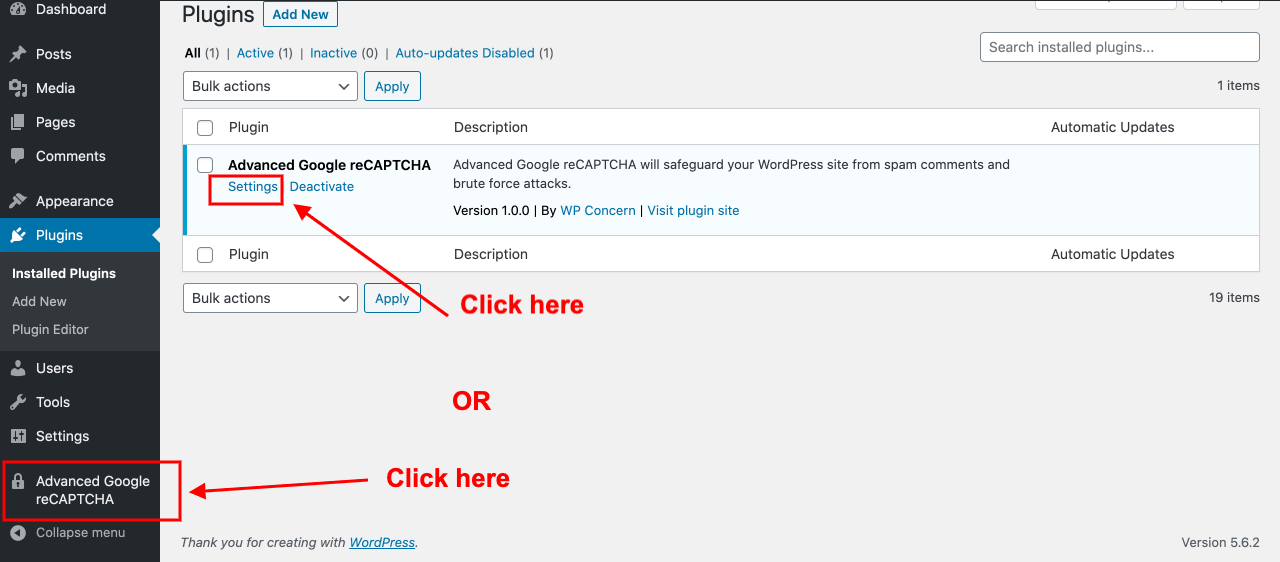
After you activate the plugin, Click on Settings of Advanced Google reCAPTCHA on the plugin listing page or Click on the Advanced Google reCAPTCHA menu on the left sidebar of your WordPress dashboard as shown in the above screenshot.
iii. Advanced Google reCAPTCHA options
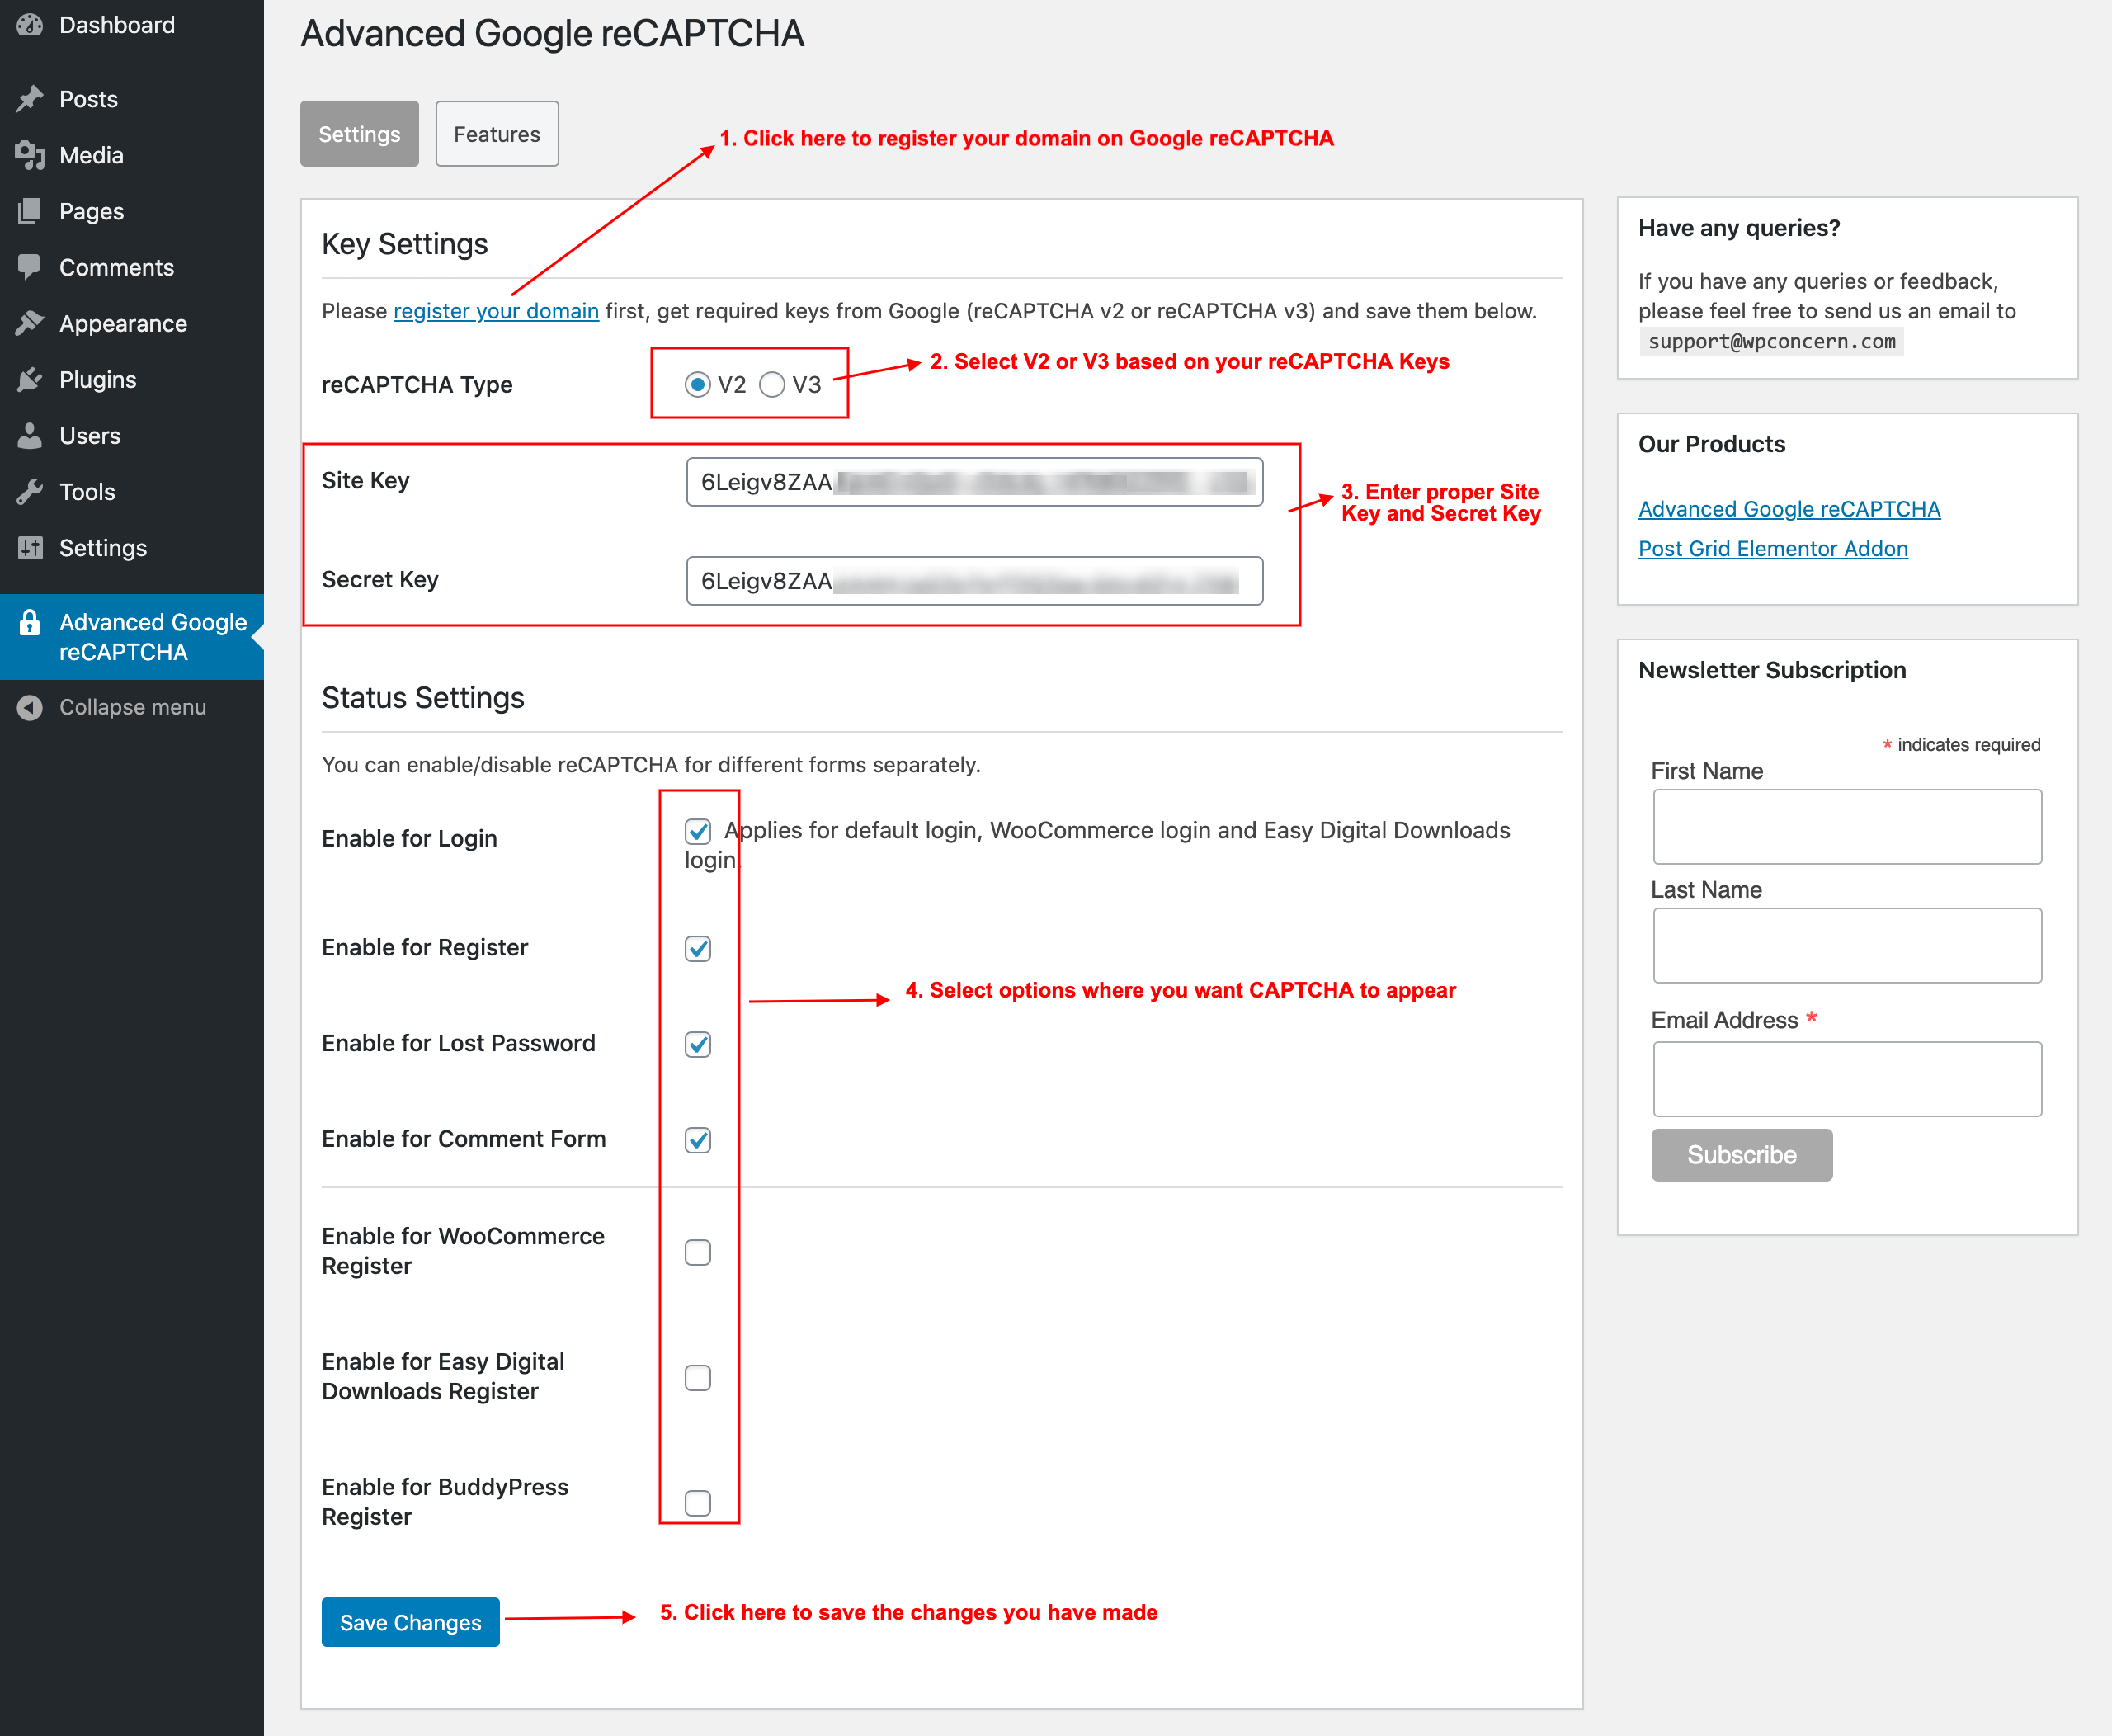
- First of all, register your website on Google reCAPTCHA which is already explained in STEP 2. If you have not followed it, you can click on the ‘register your domain’ link at the top of the plugin settings page or click here.
- Select the type of reCAPTCHA you want to use. This plugin supports both Version 2 and Version 3 of Google reCAPTCHA. Note that the type of reCAPTCHA you select here needs to be the same which you have selected on the Google reCAPTCHA admin page.
- Copy Site and Secret keys from your Google reCAPTCHA admin page and paste them respectively on the plugin’s setting form.
- Select options where you want Google reCAPTCHA to be shown.
- Finally, click on the Save Changes button to save all the changes you have made.
- We are done, your website is fully protected from Spam registration and unnecessary logins now.
4. Final Thoughts
We believe this article helped you to learn how to add Google reCAPTCHA to WordPress forms. Other than this, you can install the Akismet plugin to double protect your WordPress site from spam comments.
You can see Google reCAPTCHA added on the comment form below. If you have any feedback or want to see it in action, type your comment, fill in the required fields and hit the ‘Post Comment’ button!

Nice post and really helpful. 🙂 I followed the instruction and get what i want.