
Table of Content
Building an online store can be terrifying if you are not that techy. As the market is full of different eCommerce plugins, the biggest mistake you can make is picking the wrong platform for your online store. But the good thing is you’re not alone. We are here to make things easier for you.
As e-commerce sales are booming, getting on the right track is more important. If you’re seeking to commence an online shop with your WordPress-powered website, WooCommerce can never go wrong. This comprehensive guide on how to use WooCommerce for your online store with WordPress will smooth things up.
So, are you ready?
If you are, let’s begin with “Why use WooCommerce to make your online store.”
WooCommerce is the most downloaded eCommerce solution with over 5 million active installs in WordPress. This WordPress eCommerce plugin has got a 4.6 rating- a well-deserved status in WordPress.org.
WooCommerce is open for all, absolutely free, easy to configure, and works with any design/theme. Oh wait, you can use any method of payment, track the purchase, share the reviews, and chat with your customers. Let’s make a list.
- Seamlessly convert your already existing WordPress website into a store
- Get started with minimum cost as WooCommerce is a free plugin for WordPress
- Sell physical as well as digital products
- You can customize your WordPress site to fit any business need with the large extension library for accounting, shipping, marketing, and more.
- Pick from a wide array of secure payment gateway such as PayPal, Stripe, Bank transfer, etc.
- Detailed documentation and customer support that will walk you through any difficulties.
Well, we could continue with the list, but instead, let’s simply say that WooCommerce gives you everything needed to build a high-quality eCommerce store.
What to sell with WooCommerce? Is this the next question you are thinking about? We would risk saying that you sell anything with a price tag in WooCommerce. May it be a physical product, digital products, services, booking, subscription, or anything else you wish to sell. There are no boundaries to your imagination.
And, who can use WooCommerce? Anyone who wishes to open an online store can use WooCommerce. This plugin is simplified to a great extend- a person with zero knowledge of codes can use this e-store plugin smoothly. All you need is a WordPress site and a product/ idea to sell. And then, you are good to go.
Now, the only question remaining is: How to use WooCommerce in your website? To answer this, we’ve set up a detailed WordPress WooCommerce tutorial.
Let’s jump right in!
1. How to Start an Online Store?
The first thing you need is a WordPress website. If you already have a well-functioning site, you can install WooCommerce and start your shop right away. Otherwise, you need to start by making a website.
To set up your online store, you will need a domain name, web hosting, and then an SSL certificate. Domain name denotes the address of the website on the internet. The most used domain for online shops is .com. And then, you get web hosting, a home for your site on the internet. Lastly, it’s an SSL certificate. Thankfully almost all hosting company includes SSL certificate in their site, so it’s nothing you need to worry about.
Once the process is completed, you will get an email with all details to login into your web hosting control panel. Go ahead to your cPanel and install WordPress. Now, you can set the username and password to your WordPress Dashboard. Login to your dashboard, and we are ready for the next step.
One thing you can do is set your site address to HTTPS instead of HTTP. Using HTTPS in your WordPress Address and Site Address is said to be safe. On the Settings » General page, change your WordPress Address and Site Address. Lastly, scroll down to the page bottom and click on the Save changes to store your settings.
Now we move towards setting up your online store.
2. Install the WooCommerce Plugin
Now, the next step is installing WooCommerce on your website. One can simply download the plugin and upload it to your site. Go to Plugins > Add New> Upload Plugin and then upload the zip file. If you wish to get the premium plugin, this is an ideal way to install it.
Even easier, one can get the WooCommerce plugin right in the WordPress dashboard. To do so, go to your WordPress site dashboard and get to Plugins > Add New. Here, type “WooCommerce” on the search board and then press Install Now.

Then, click on the Activate button, and you will have WooCommerce running on your site. Now you are ready to move towards the second step.
3. Step up the plugin
Once you have installed WooCommerce, it’s time to walk into the setup wizard. The initial WooCommerce setup wizard page looks like this.
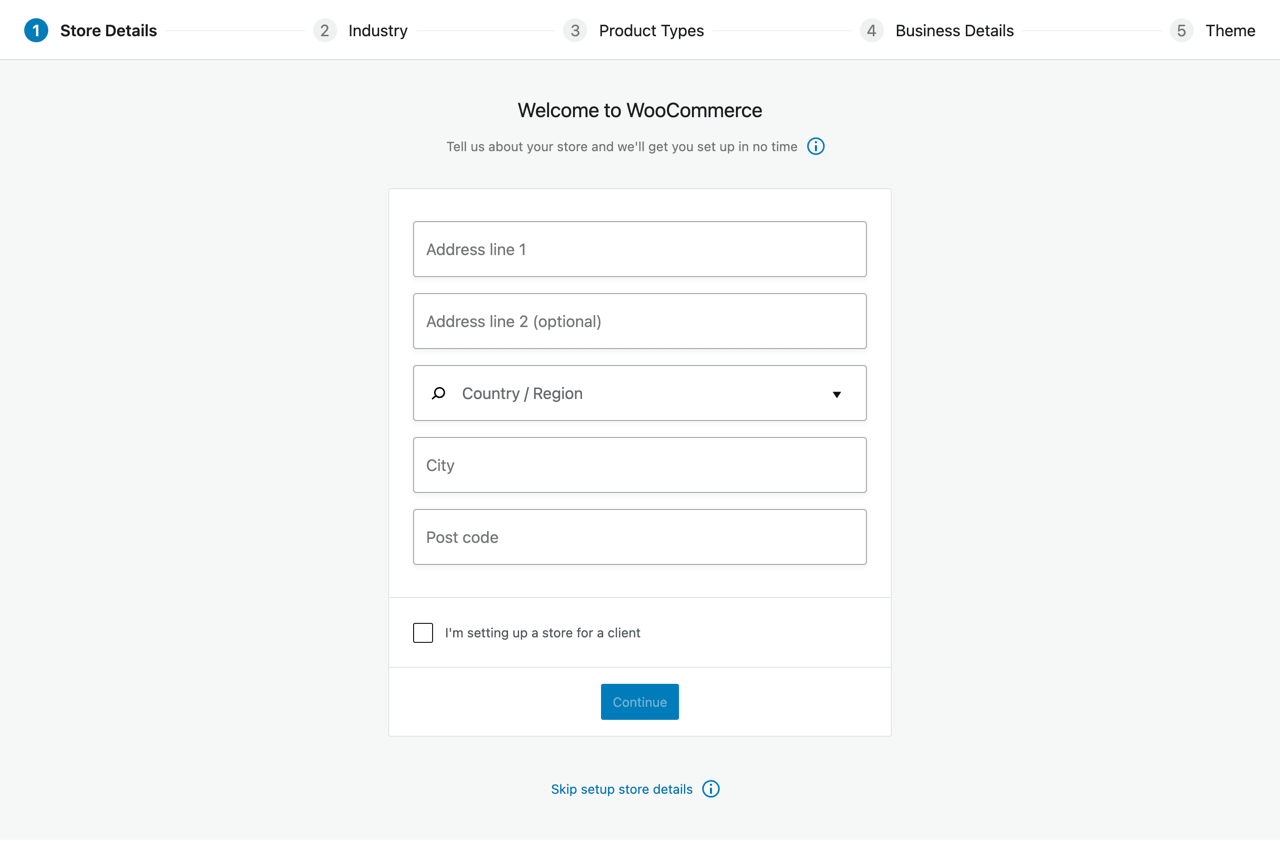
i) Store Details
First and foremost, you will enter basic information regarding the store- address, city, and postcode. You can also skip this section and fill in the information later. Also, you can modify the information from the WooCommerce settings.
ii) Industry
Here, you can select the types of industry in which your store operates. You can select multiple industries depending the nature of your store.
iii) Product Types
Next, you select the type of product you want to sell. It can be Physical Products, Digital Downloads, Subscriptions, Membership or other type of products you want to sell.
iv) Business Details
In this step, you can provide information like the number of products you want to sell, either you are selling products somewhere else or not and select recommended/suggested additional addons depending on the information you provide.
v) Theme
Finally, you can select the theme you want to use for your online store. You can continue with your existing theme or can switch to the new WordPress theme if you wish.
vi) Install Jetpack Plugin (Optional)
The next page suggests to install the Jetpack plugin that bestows you with a wide range of features. It comes with security functionality, analytic tools, and more. Jetpack can be a wise suggestion, but you can proceed without using this.
You can now complete the remaining setup processes shown below.

Further, you should not skip these setup process to run your online store smoothly.
vii) Choose payment methods
You can pick the payment method you would prefer to have. By default, WooCommerce suggests Stripe or PayPal along with offline payments such as checks and cash. Stripe and Paypal are extremely trusted methods of payment for online transactions.
Further, you can enable cash on delivery or use a local payment gateway as per your location. You can add more payment processors in the coming days.
viii) Set up shipping costs
Here, you can enter the shipping rate according to the preferred zone and specific locations. WooCommerce comes with a great setting that permits you to select the place you’re going to be shipping and set the shipping prices for each of those locations. You can fix a rate per mile (or km), and WooCommerce does the calculation for you. Sounds easy? It is.
Finally, your online store is all set to rock and roll.
4. How to Add New Products in WooCommerce?

Once you complete the WooCommerce installation, you will see two new tabs on your dashboard’s menu- WooCommerce (general settings area) and Products (products settings area).
Since we have already completed the settings, we can move to add new WooCommerce products. To begin with, go to Products > Add New. The familiar WordPress editor is seen on your screen. This box is similar to the ones we have been using to post articles in WordPress.
First, keep the title and a short detail of the product.
i) Adding Key Details to Simple Product

If you scroll to the post editor page, you can see two widgets. The first one is called the Product data section- add more details about your product.
First, select the type of the product- Physical, Downloadable or Virtual. Selecting the virtual option, you will automatically remove the shipping cost.
General tab: Place the regular and sale prices. For the Digital product, you can upload the file, customize the download limit, and also set the download expiry.
Inventory tab: Manage your stock with the quantity of the product, stock status, and more. You can also mark the product sold.
Shipping section: Enter the item’s weight, shipping class, and dimensions.
Linked Products: Add upsells and cross-sells
Attributes: Describe the product’s characteristics
Advanced tab: Enter custom purchase notes, set product position in your menu, view recommended extensions, and enable or disable reviews.
ii) Adding Variable Product in WooCommerce
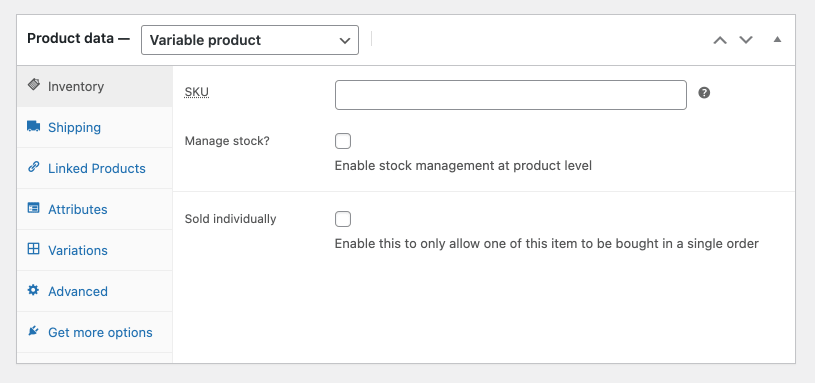
Most of the time, we need to sell items that have multiple options? Color, size, design, quantity, and quality are some variables that are often seen. For that, select the Variable product option of Product data. Now, you have access to the new Variations tab.
With the use of attributes, you already entered, build multiple versions of your product that is visible to the customers. This way, you can keep all the products on the same page and save time to build multiple pages for a similar product. And it will definitely ease your customers to locate the product.
iii) Giving it a Final Touch
Below the Product data widget, you can find a Product short description that allows you to write optimized content regarding the product. Here, you can write a concise tagline that is visible underneath the product’s title. Further, you can add the item’s primary benefits.
Exploring more, you need to assign a category, add tags to your product, include a Product image (Featured image), or add an entire image gallery. Once you are done, it’s time to hit the Publish button to make it live on your site.
5. Managing Your WooCommerce Products

After you have filled in a number of items in your store, it’s hard to open each one of them to make simple changes. Fortunately, you can use the Products tab in your dashboard to manage your products. You can add, remove, and edit the products as per your need.
You can view and change your product tags, categories, and attributes. Organize your inventory using different filters and quick editing options from this page.
Now onwards, we will learn to improve the design and functionality of your e-store to captivate more visitors to your site. And how is that done? Let’s learn.
6. Select and Customize WooCommerce Theme
WordPress theme controls the ultimate design of your site. Getting a perfect design might sound a bit expensive, but that’s not the case here.
With WordPress, you’ll get to design your store from the beginning or pick one of the ready-to-use themes. For a WooCommerce shop, the theme determines how your products are displayed. Among thousands of paid and free themes in the market, you can pick the one that suits your products. Having a storefront theme plugin, you can download any theme and customize it to meet your needs.
You can either get a free theme or enjoy the unlimited premium option. While premium WooCommerce themes come with great functionality, it can be a heavy budget for a start-up. The choice is upon you. But make sure that the theme has one of the following characters.
- Compatibility with WooCommerce – it should have built-in compatibility for the checkout page, shopping cart, product listings, and optimized views for your products.
- Customization options that permits fine-tune to match your store’s brand
- Lightweight with minimum codes so that the theme loads within a millisecond
- SEO-friendly structure with auto-optimization for all kinds of devices.
Head over to the Appearance » Customize page and change the theme settings or add a new one. You can change the color, fonts, buttons, layout, or anything you wish with the live customizer.
Just in case you are not satisfied with any of the themes available in the market, one can build the design from the starch. With the use of page builders, you can create the design of your choice without any coding knowledge. We recommend using Elementor page builder which is extremely flexible and easy to use. Build a unique and brand-oriented design so that you have a special place in the market.
7. Get Additional Plugins
WordPress is already a great deal, but its plugins are more than awesome! With the use of e-commerce plugins, you can amplify the native feature of your WooCommerce and add pretty much every function you need. Naturally, you can see a large number of plugins built to extend the WooCommerce stores.
You can get the plugin available in the WordPress dictionary when you go to Plugins → Add New. Write the name of the plugin you wish to insert and then press on Install.
But the real question is, “What are the most useful e-commerce plugin?” We have made a shortlist for you.
- Booster for WooCommerce – This plugin includes PDF invoicing, multiple currencies support, product add-ons, email management, price labels, and more.
- Yoast SEO – This popular SEO plugin gives you a better rank in search engines.
- WooCommerce Side Cart – This plugin allows you to display the shopping cart on the side of your website.
- TranslatePress – This translation plugin inserts different language versions into your e-store for free.
- Optimole – This image optimization plugin can be a game-changer to your site. Optimizing your images can save 30-80% of the site’s space. Eventually, you have a better site speed and more sales.
- WooCommerce Product Tabs – This plugin allows you to add additional tabs to your products. You can add as many tabs as you need with this plugin.
You’ve done it! If you are going along with us, at this stage, you should have finished setting on your e-commerce store. Now, your doors are open to getting an order from your customers!
But the journey is yet to start. Getting the first stream, second stream, and then more streams of people to your store is the real challenge.
8. How to Grow Your WooCommerce Store
With these quick WooCommerce tips and tricks you can grow your online stores easily and provide better experience to your customers.
- Offer user-friendly experience with simple navigation. The use of breadcrumb links and navigation menus can smoothen the user experience on your site.
- Writing Valuable, short, and yet engaging product descriptions. You need to do some research and understand your product properly. Use captivating words, Consider SEO, and don’t sound too sales-oriented or desperate. This balance can be hard to strike but not impossible.
- Make important information about the product clear and prominent. Being honest about the quality, and clear on the price, shipping charges, delivery, and return policy will help you win customer’s trust.
- The use of high-quality product images, multiple images displaying different viewpoints, and using different shots can give great value to your customers.
- Using creative video is a great way to give additional reassurance to the customers as well as google. Using the same video for YouTube, Vimeo or Wistia will give you valuable backlinks and shares.
- Optimizing Your Store for SEO – both on-page SEO and off-page SEO are vital. Having well-planned SEO strategies, and their proper implementation is useful.
- Make the products easy to find with the use of filters, menu elements, price sort, and so forth.
- Make Products Easy to Share by incorporation of social media button into your site.
- Ever seen buttons like Buy Now. Add to Cart. Sign up. etc. on a website? These links are called Call to Action (CTA) buttons. Adding CTA buttons wisely in your online store help to gain the attention of your customers.
- Reduce the steps required to check out the product and complete a purchase quickly and easily.
- Measure the speed of your website and ensure that it is fast and reliable- a slow-loading website is a true buzzkill to your visitors. You can measure your site speed with online tools like GTMetrix, Google PageSpeed Insights and so on.
- Optimize the checkout process to make it easy and quick. Firstly, remove the Forced Logins/Registrations and provide multiple payment gateways.
- Ensure that your site is secure and trustworthy. How? Update the WordPress site, back up your site’s data, use SSL to secure traffic, and add some security plugin.
- Perform a usability test by random people who have never visited your site. Such usability tests entail getting people’s views on your website from the buyer’s perspective. Think of this procedure as a beta test. So, you need to convince a handful of people to look for the following things on your site.
- Easiness to interact with your website
- Easiness to locate the product page without any hassle
- Is the page too cluttered?
- Are CTA buttons well-placed and easy to find?
- Is shopping carts confusing to the users?
- Pages that seem useless and the pages that seem to have a good impact.
- Run A/B Tests – A/B testing or split testing creates two distinct variants of every element of your website and shows the outcome and conversions of both variations. The test analyst’s metrics include Conversion Rate, Return on Investment, Bounce Rate, and Number of purchases. In the end, you can identify which variation gives a better outcome. A/B testing is useful to add some new features to your site. Use of an A/B test plugin such as the Nelio AB Testing plugin can help you do that task.
- Use email receipts to upsell related products, connect with the customer for feedback, share an update about the discount and new products.
- Use discounts strategically so that you still have profited while gaining a customer. For eg: you can reserve discounts only for loyal customers on a membership-based website.
- Reduce shopping cart abandonment by lowering the number of steps to purchasing products, display all prices included in the purchase, and avoiding asking for repeat information.
- Notify your customers via SMS, Using Live Chat, and build Trust Signals via Customer Reviews, Video Testimonials, Press Mentions, and so on.
- Lastly, track, analyze, and review your performance.
Summing Up
Was the article useful to you? We really hope it was. If you have any queries regarding “8 Quick WooCommerce Tips and Tricks to Make Your Store More Effective” feel free to connect with us. Your comment will be an encouragement to us.
Best wishes!!