Table of Content
Do you want to make your website reach a diverse group of people who speak different languages? Do you want to see your website ranked higher in the search engines? Or do you want to address the language barrier of your visitors and audience?
A multilingual website is a solution to all the aforementioned questions. A multilingual website is a website that is available in more than one language. A multi-language website is most needed in order to succeed for charities, international organizations, educational institutes, hospitals, and other agencies whose users are from different countries. Creating a multilingual website used to be a nightmare in the past. However, with WordPress and a few plugins, it has become easier these days.
In this article, I will show you how to easily create a multilingual WordPress site with Polylang. Polylang is one of the popular multi-language plugins for WordPress users which allows us to create multilingual or bilingual websites easily.
1. Install and Set Up Polylang
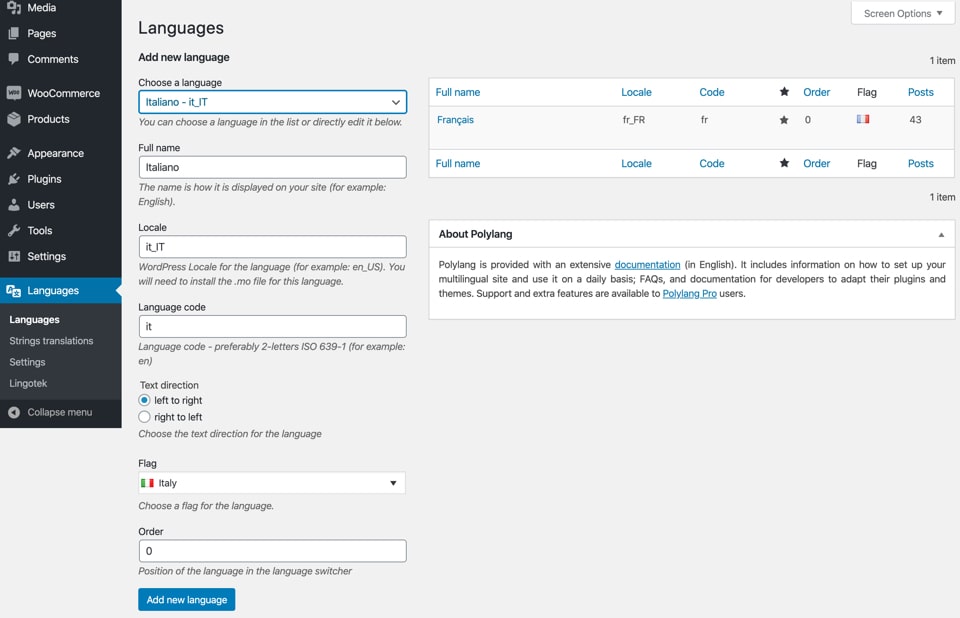
First of all, install and activate the Polylang plugin. Once activated successfully, go to Languages and add your desired languages. For example, choose Italiano and click Add new language as shown below.
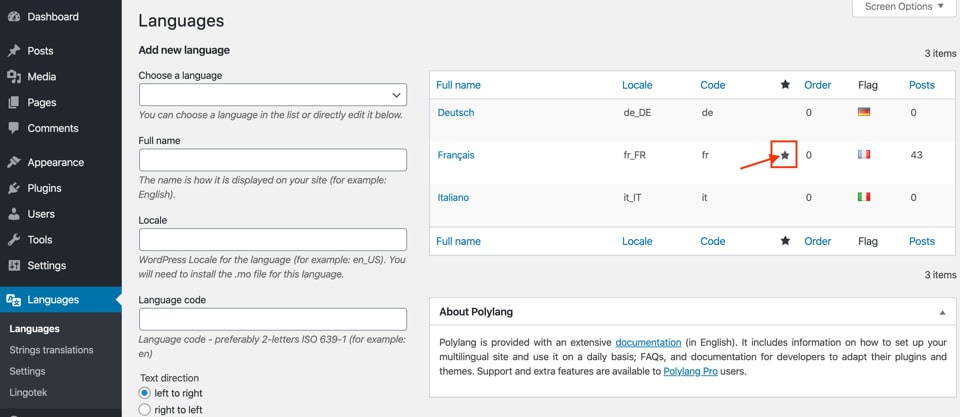
Select the default language for your website by clicking on the star icon as shown below.
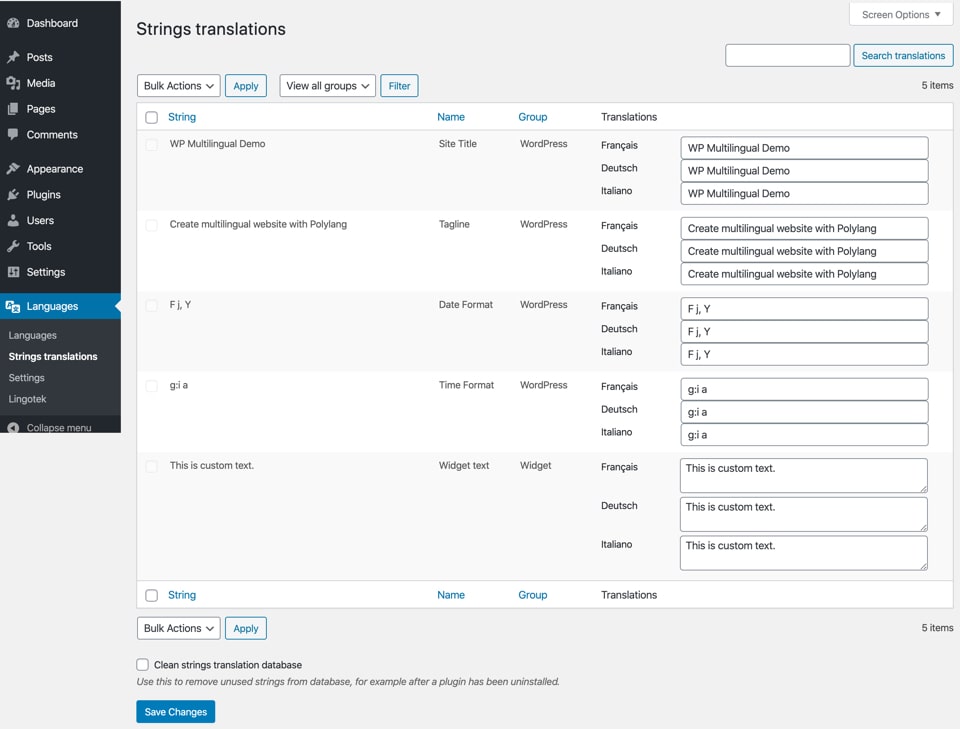
After you add your desired languages and select a default language, Go to Languages > String translations. You can translate the Site Title, Tagline (i.e. Site Description), Date and Time Format. Additionally, you can also translate Widgets and other strings from there.
2. Multi-Language Menu Set Up
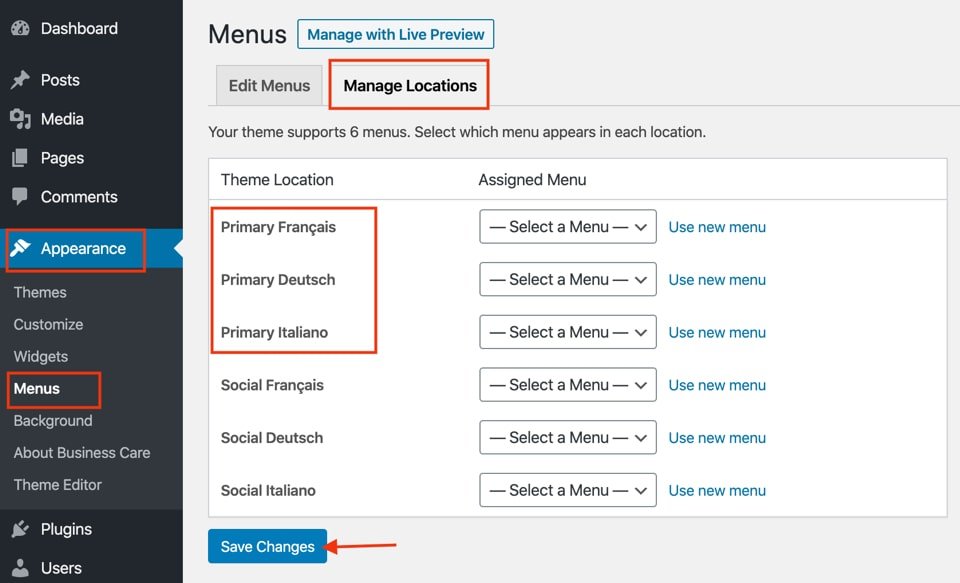
Next, Polylang adds new theme locations for each language and for all the menus available. Create a separate menu for all languages and assign them to respective theme locations.
- Go to Appearance > Menus > Manage Locations
- Create a separate menu for each language and assign them
- Click on Save Changes
3. Adding Multilingual Content (Posts, Pages, etc)
Polylang makes it super easy to translate content like posts, pages, custom post types and others in different languages.
Here we take an example of editing or adding a new post. You can repeat the same process for pages and custom post types.
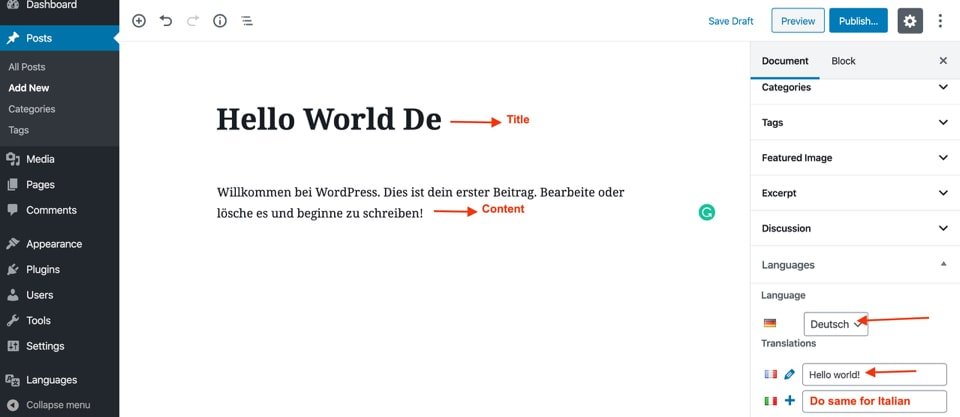
Go to Post and select the desired post. Click on + icon of each language you want to add.

You will then find a new post section where you can add title and content for the respective languages.
4. Widgets Translation
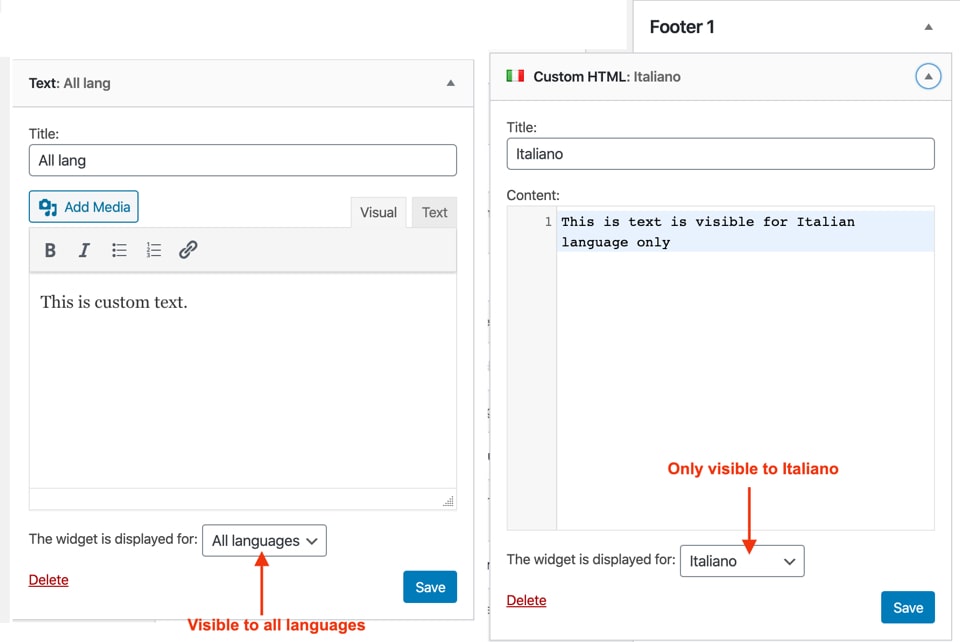
Polylang allows you to translate widget to one or all languages.
- Go to Appearance > Widgets
- Add widget you need to the desired sidebar
- You can find the option to set it for one or all languages at the bottom of each widget
5. Categories, Tags, and Custom Taxonomies Translation
With Polylang, you can translate categories, tags and custom taxonomies easily.
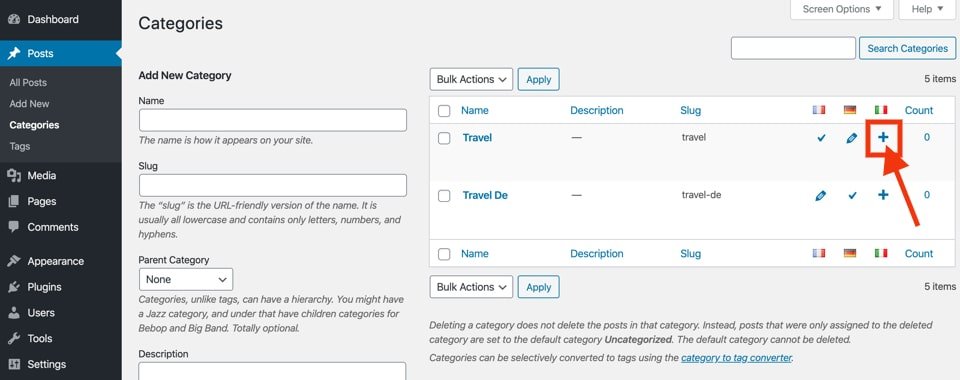
Go to Posts > Categories and then click the plus icon for each language you want to translate.
Follow the same process for Tags and Custom Taxonomies.
6. Displaying Multi Language Switcher
You can add a language switcher in different ways. In this article, I am going to show 2 different ways to show a language switcher on your website.
6.1. Adding Language Switcher on Sidebar
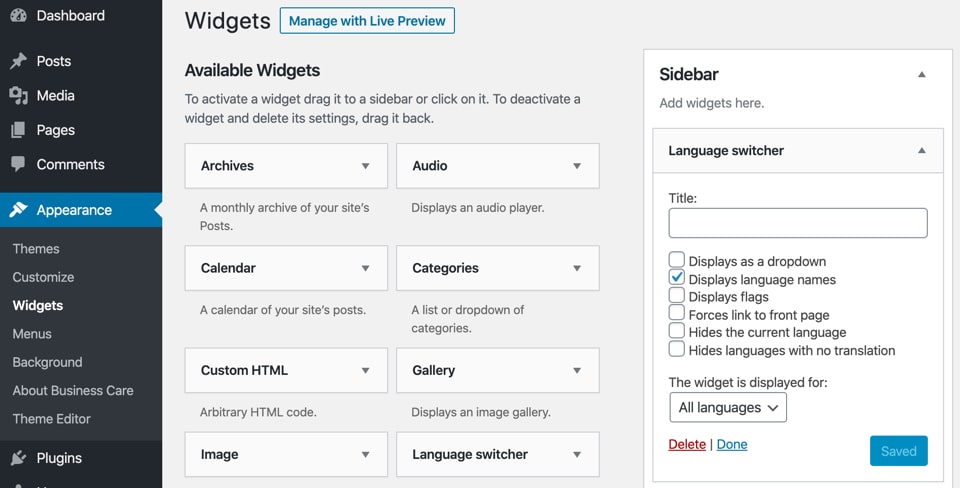
Go to Appearance > Widgets, add the Language switcher to the desired sidebar and save the configuration as per your need.
6.2. Adding Language Switcher on Menu
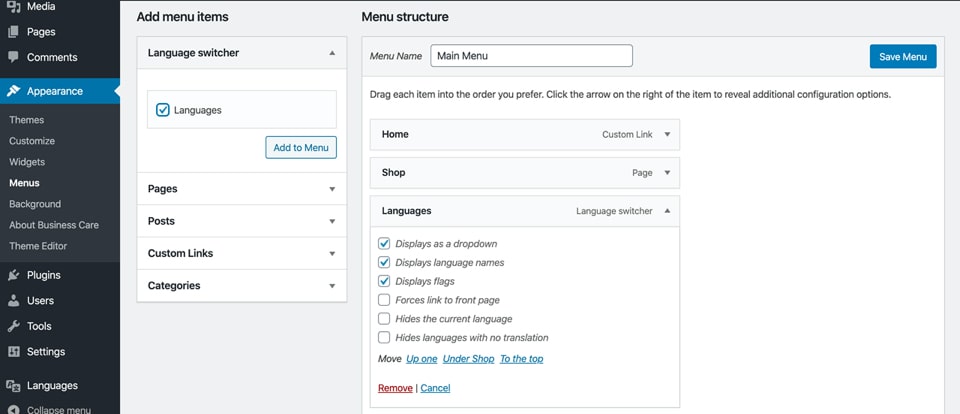
Go to Appearance > Menus, check Languages and click Add to Menu. Select the options as per your need and Save Menu.
7. Final Say
Last but not least, I believe this article will help you to set up a multilingual WordPress site. If you want to learn more about Polylang, you can find complete information at Polylang Documentation.
If you have any questions about creating a multilingual WordPress site, feel free to contact us or post a comment below.

Hello! Nice post … But a quick question: Why when you translate your website in different languages and then you search on Google USA for your website and you can see all the translated pages and not only the language for the country you searched for? Maybe can someone answer. Best Regards